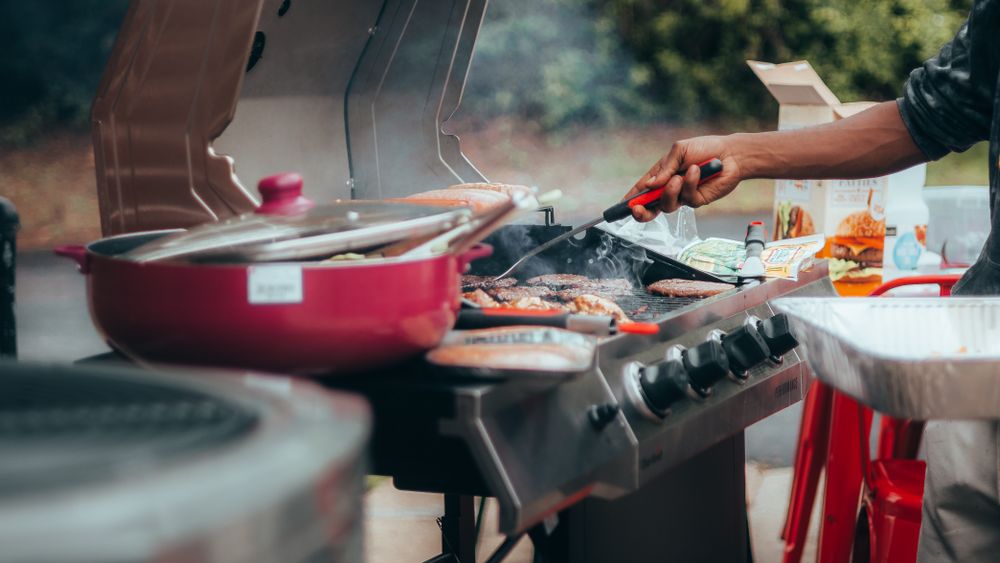
The short answer: Six items are enough to get started: long grill tongs, heat-resistant gloves, a spatula, a safe cleaning tool, an instant-read probe thermometer and, for charcoal, a chimney starter with firelighter cubes. Together this costs roughly €80 to €150. Everything else, from drip trays to a cover, you buy only when you concretely miss it.
Grill accessories are sold by piece count. A case with 20 pieces looks like a proper kit, but fifteen of them never leave the foam, and the five you do use are too short and too thin. Yet a barbecue evening usually stumbles on just two or three small things: no shelf for the platter, no gloves for the hot grate, no thermometer for the expensive cut of meat. Here you can read which loose tools make the difference and how to spot bad buys in advance.
What really belongs in the grill accessories essentials?
Six items: tongs, spatula, gloves, cleaning tool, instant-read probe thermometer and, for charcoal, a chimney starter with solid firelighters. Everything else in the table is comfort or a special case. The price ranges are rough market values for solid goods; every category is open-ended at the top.
| Accessory | Priority | What it is for | Approx. price range |
|---|---|---|---|
| Grill tongs, 40 to 45 cm | Must-have | gripping and turning without risk of burns | €10 to €25 |
| Grill gloves with long cuff | Must-have | handling grates, trays and the chimney starter | €15 to €40 |
| Cleaning tool for the grate | Must-have | removing residue before it burns on | €10 to €25 |
| Chimney starter plus firelighter cubes | Must-have for charcoal | getting charcoal glowing safely and without chemicals | €20 to €45 |
| Instant-read probe thermometer | Must-have from the first expensive cut | core temperature instead of guessing | €15 to €30 |
| Second chopping board for raw meat | Must-have | keeping raw and cooked apart, hygiene | €10 to €30 |
| Spatula or turner | Useful | burgers, fish, anything flat | €8 to €20 |
| Aluminium grill trays (pack) | Useful | drip tray, vegetables, catching marinade | €5 to €10 |
| Silicone brush | Useful | applying marinade and glaze | €5 to €12 |
| Shelf or side table | Useful | hands free, somewhere to put platters | €30 to €80 |
| Cover | Useful for outdoor locations | protection from rain, leaves and UV | €20 to €50 |
| Grill basket or flip basket | Special case | fish, prawns, diced vegetables | €10 to €25 |
| Metal skewers | Special case | skewers without burnt ends | €10 to €20 |
| Stainless steel grill tray | Luxury | permanent replacement for aluminium trays | €15 to €30 |
| Ash vacuum | Luxury, charcoal grills only | removing ash without a dust cloud | €40 to €90 |
| Wireless thermometer with several probes | Luxury | monitoring long cooking times | €50 to €120 |
Deliberately not on the list: grates and built-in features. Cast-iron grates, plancha, sear zone or rotisserie attachments belong to the grill, not to the accessories. Which grate material suits your grilling style is covered in the grill grate guide. You can find an overview of the loose items in Grill accessories compared.
Which grill tongs are the right ones?
One made of solid stainless steel, 40 to 45 cm long, with ridged, slightly curved jaws and a spring you can squeeze with one hand. Anything shorter is the most common bad buy: a 30 cm pair from the kitchen drawer forces your forearm over the embers as soon as you need to reach the back row of the grate. Beyond 50 cm it tips the other way, the lever gets long and the feel for heavy pieces is lost.
Three features separate usable tongs from bad ones. First, the material: solid metal rather than folded thin sheet, because sheet-metal tongs bend as soon as you lift a rolled roast or a full grill basket. Second, the jaws: ridged across and slightly arched, so a sausage does not slip out sideways. Pointed, serrated jaws pierce steaks and let the juices run out. Third, the handle, which has to sit far enough from the hot end. Tongs with built-in electronics, such as an integrated thermometer, rarely last long in constant heat.
The spatula complements the tongs rather than replacing them. A thick edge turner pushes a fish fillet apart, while a thin, sharpened-at-the-front and slightly flexible palette slides underneath and releases it from the grate. For burgers, a width of about 10 cm or more is enough; for whole fish, an extra wide blade is worthwhile. Here too, look for at least 35 cm overall length.
Two small items belong in the same drawer. A silicone brush for marinades and glazes, because natural bristles char over the embers and are left behind one by one in the food; a removable head is what makes cleaning practical in the first place. And a spray bottle with water to keep butcher paper moist. What the spray bottle explicitly is not: an extinguisher. Water on burning fat evaporates instantly and flings the fat metres away. For a grease fire the rule is lid on, gas off, close the air supply; more on this under preventing grease fires.
Which grill gloves really withstand heat?
Those where the manufacturer states a temperature and a contact time, and which reach at least beyond the wrist. A figure without a time is worthless, because every material tolerates a brief touch, but hardly any tolerates ten seconds on a glowing grate. If the information is missing entirely, it is an oven glove with a barbecue print.
Almost everyone underestimates the cuff length. Burns rarely happen on the palm, but on the forearm when reaching over the hot grate or into a kettle grill. A 15 cm cuff above the wrist is the minimum, and for kamado and deep kettle grills more is better. And: gloves must be dry, because damp fabric conducts heat immediately.
| Material | Suitability | Limit |
|---|---|---|
| Cotton, oven-mitt fabric | briefly touching handles and lids | soaks up fat and water, when wet it passes on the heat almost unchecked |
| Silicone, smooth | briefly gripping hot trays and grates, easy to wash | little feel, slips with a film of fat, does not tolerate flame contact |
| Leather, usually cow or goat | adding charcoal, emptying the chimney starter, moving grates | does not tolerate moisture, turns hard after soaking, seams are the weak point |
| Aramid or blended fabric | longer contact, lifting whole grates and pans | the inner lining determines the real limit, not the outer fabric |
| Nitrile or latex gloves | handling raw meat, pulling pork | practically no heat protection, only hygiene and cleanliness |
In practice, a two-part approach works best: one pair of robust leather or aramid gloves for everything hot, one box of thin disposable gloves for everything raw. A single pair for both puts raw meat and handles on the same surface.
How do you light charcoal properly?
With a chimney starter and solid firelighters, never with methylated spirits, petrol or other accelerants. Liquid accelerants flash uncontrollably, can flare back at the container and leave a taste in the food. A chimney costing €20 to €45 does the job in 15 to 25 minutes, without fanning.
Three types of firelighter are usable: firelighter cubes made of wood and wax are low in odour and cheap, firelighter wool burns longer and also lights damp briquettes, and electric lighters need a socket but come without consumables. Newspaper is the least suitable; it burns too briefly and the ash flies around the neighbourhood.
- Place the chimney on a fireproof surface, on the charcoal grate, a stone slab or the ash catcher, never on wood or plastic.
- Put the firelighters under the chimney, one or two cubes or a handful of wool, and only then light them.
- Fill the chimney loosely with charcoal or briquettes, do not press it up to the rim, the air has to draw through from below.
- Wait 15 to 25 minutes. Briquettes take longer than lump charcoal. The load is ready when the top pieces are covered in grey.
- Pour out wearing a glove and using the support handle, away from your body and not above head height. Chimneys with a second handle at the bottom are clearly safer here than models with only one bail.
- Spread the charcoal with charcoal tongs or a poker, not with the grill tongs, otherwise you carry ash residue onto the food.
- Put the grate on and preheat for 5 to 10 minutes.
Two points with no room for compromise. A charcoal or gas grill never belongs in enclosed spaces, in the garage, in the tent or in the conservatory, not even to cool down after grilling: glowing and dying charcoal gives off odourless carbon monoxide, which is life-threatening indoors. And ash stays hot enough for many hours to ignite paper, so it belongs in a metal bucket rather than in the general waste bin. An ash vacuum for €40 to €90 is pure comfort, but it is the dust-free way to empty a kettle grill.
What do you use to clean the grate safely?
Best with bristle-free tools: a spiral brush, grate scraper or cleaning stone, and always wipe over afterwards with a damp cloth. The reason is the weak point of classic wire brushes: individual metal bristles come loose over time, get caught between the grate bars and end up in the food, and there are documented cases of injury from swallowing them. If you want to keep a wire brush, check it for loose bristles before every use and replace it earlier than its appearance suggests.
| Tool | What it is good for | What to watch out for |
|---|---|---|
| Wire brush, brass or stainless steel | burnt-on residue on a hot grate | bristles can come loose; check regularly, replace early, wipe down damp afterwards |
| Spiral brush without individual bristles | the same job without loose metal | the spiral widens over time, then the contact pressure drops |
| Wooden grate scraper | cast-iron grates and wide bars | cuts itself into shape on first use and afterwards fits only that grate |
| Cleaning stone, porous | enamelled grates and stainless steel | visibly crumbles, wipe off residue; on cast iron it removes the seasoning layer |
| Scrunched-up aluminium ball in the tongs | emergency solution without a tool | little contact pressure, some aluminium abrasion stays on the grate |
| Half an onion on the hot grate | home remedy for fresh residue | does not replace mechanical cleaning, only works straight after grilling |
| Damp cloth or kitchen paper | last step after every method | not an extra, but the step that actually removes bristles and abrasion |
The routine takes less than three minutes if you do it straight away:
- Leave the grate hot, close the lid, let residue carbonise for 5 to 10 minutes.
- Scrape it off mechanically, with a scraper, spiral or stone, always along the bars.
- Wipe over damp, with a folded cloth held in the tongs.
- Oil a cast-iron grate thinly, not necessary for an enamelled or stainless steel grate.
You rarely need aggressive spray grill cleaners: a burnt-on grate almost always comes clean mechanically and with heat.
Trays, baskets, skewers and the space around the grill
Aluminium grill trays are the cheapest accessory with the biggest effect: they catch fat under indirectly cooked meat, prevent flare-ups and save the charcoal bed. The typical bad buy is material that is too thin, which buckles when lifted out and tips hot fat. Choose the thicker version, two trays nested inside each other or a stainless steel tray for €15 to €30.
A grill basket or flip basket is the specialist for everything that falls through the grate or tears on it: prawns, diced vegetables, mushrooms, whole trout. A tight mesh, a handle set away from the heat and a closure that does not spring open when the basket is full are important. Skewers made of metal in a square or flat shape hold meat in place when turning, round skewers let it spin. You soak wooden skewers for at least 30 minutes and use them once.
When it comes to hygiene there are no compromises: raw meat and finished food never go on the same board and never on the same platter. Two boards of different colour or shape cost €20 to €60 together, one of them with a juice groove for carving and resting. If you have only one board, use it for the raw meat and serve from a separate platter. Aluminium foil is good for improvised drip trays and for loosely covering during resting, butcher paper lets moisture through during long cooking times and does not soften the crust.
The most common thing missing is surface space. Two folding tables at the grill or a side table for €30 to €80 replace the balancing act with a platter in one hand and tongs in the other. The cover protects against rain, leaves and UV, but only over a fully cooled and dry grill. Over a damp or still warm unit it traps condensation and speeds up corrosion exactly where you wanted to prevent it; covers with ventilation openings are therefore the better choice. You store the remaining accessories dry and not inside the grill.
What you do not need
- The 20-piece tool set in an aluminium case. Chrome-plated thin sheet metal, handles under 35 cm, plus a meat fork, miniature skewers and a brush with a fixed head. The chrome layer flakes off with heat over time. Three decent individual pieces cost about the same and outlive the set by years.
- An infrared thermometer as a replacement for an instant-read probe thermometer. The laser-point device measures only the surface, that is crust or grate, and says nothing about the core. It is useful for grate zones and pizza stones, but not for doneness; which device suits which purpose is covered in the grill thermometer buying guide.
- Grill mats with a non-stick promise. They prevent sticking, but also block contact with the grate: no grill marks, fewer roasted flavours, plus a temperature limit that is quickly reached over open embers. A plancha or stainless steel tray lasts longer.
- An electric rotisserie for people who never cook whole chickens. The attachment is good, but only for whole poultry, rolled roasts and gyros. For steaks, sausages and vegetables it adds nothing.
- Vacuum marinating containers with time promises. Marinade penetrates barely deeper than one to two millimetres within a few minutes, regardless of the vacuum.
What to buy in which order
Stage 1, together about €60 to €120: Tongs, gloves with a cuff, cleaning tool and, for charcoal, a chimney starter and firelighter cubes. This is the safety equipment: without it you work with tools that are too short and improvise when lighting.
Stage 2, together about €40 to €90: Instant-read probe thermometer, spatula or palette, a pack of aluminium grill trays, a second chopping board. These four change the result more than any grill upgrade. The thermometer alone saves more expensive meat than any marinade.
Stage 3, after the first few weeks: Shelf or side table, cover, silicone brush, grill basket. Only buy here once you have actually missed something twice. This very order prevents the cupboard full of unused items.
Stage 4, for frequent grillers: Wireless thermometer with several probes, stainless steel grill trays, metal skewers, ash vacuum, butcher paper. All of it is comfort, none of it is a prerequisite for a good result.
If the grill itself is not yet settled, reverse the order: first decide on the unit by grill type, number of people and location, then the accessories to go with it. The grill finder narrows the choice down in a few steps, and part of the accessories question answers itself along the way, because a gas grill needs neither a chimney starter nor an ash vacuum.